Template editor workspace
The following image outlines the main areas and sections you will see when building or editing a template. The numbers on the image correspond with the numbered sections below the image that explain a specific area of the template page in detail.
Note that depending on your permissions, you may not be able to access this page.
Template editor
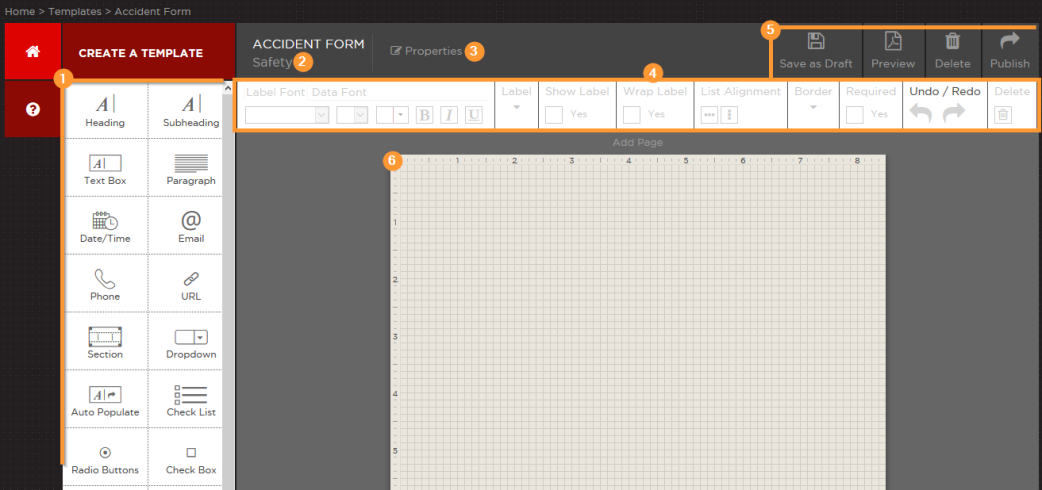
Corresponding template areas and actions
1. Palette
The Palette contains components for building your template. Drag a component from the Pallete and drop it where you need to on the canvas. From here you can use the component's properties and the Template Toolbar to customize the look of your component.
To learn about component types and individual components, see Components.
2. Template name and template category
The name given and template category assigned to the template when it was created. You can change the name and template category at anytime by clicking Properties.
3. Template properties
Click Properties to open the Template Properties box and manage the information about the template you are editing or creating. These are the same properties presented to a user on the Create New Template page. See the Create a new template help topic for field definitions.
4. Template Toolbar
The Template Toolbar is the white toolbar located above the Canvas. Use the controls in the toolbar to change the appearance of components you add to your template.
5. Template actions
The Properties toolbar contains the following actions for templates:
- Save as Draft – Saves your template as a draft that will be accessible in the Drafts tab of the Templates area.
- Preview – Click to open PDF preview of your template as a form in a separate tab.
 Browser settings for PDFs
Google Chrome
- Open Chrome.
- Click on the three vertical dots icon to open the Customize and control Google Chrome menu.
- Click on Settings.
- Click on Show advanced settings.
- Click on the Content settings button.
- Locate PDF Documents and check the option Open PDF files in the default PDF viewer application.
Firefox
- Open Firefox.
- Click on the hamburger icon to open the Menu.
- Click on Options.
- Click on Applications from the sidebar menu.
- In the Applications table, select Portable Document Format (PDF) and select the action Always ask.
- Delete – Deletes the template you are currently working on.
- Publish – Publishes the template to the Forms area, where it can now be used by Form Fillers. The published template will also be accessible from the Published tab in the Templates area.
6. Canvas
The Canvas is where you will build your template using components from the Palette, the Template Toolbar, and Properties.
Template Toolbar controls
This section describes the controls in the toolbar used to format the appearance of components you add to your template.

Skip to: Label Font and Data Font | Label | Show Label | Wrap Label | List Alignment | Border | Required | Undo/Redo | Delete
Label Font and Data Font
Use this control to change the appearance of the label font![]() The typeface and styling used for the label that identifies a component. and the data font
The typeface and styling used for the label that identifies a component. and the data font![]() The typeface and styling used for the information entered in a component. on a component. Here you can change font, font size, color, and style.
The typeface and styling used for the information entered in a component. on a component. Here you can change font, font size, color, and style.
Applies to: All components except Heading, Subheading, Paragraph, Embedded Media, Embedded File, and Hyperlink.
Label Font and Data Font tools

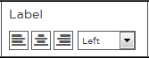
Label
Use this control to change a label's text alignment and position on the component.
Applies to: All components except heading, Subheading, Paragraph, Embedded Media, Embedded File, and Hyperlink.
Label tools
Show Label
Use this control to choose whether to include a label on the selected component.
Applies to: All components except Heading, Subheading, Paragraph, Embedded Media, Embedded File, and Hyperlink.
Show Label check box

Wrap Label
Use this control to choose whether to wrap a label on the selected component.
Applies to: All components except Heading, Subheading, Paragraph, Embedded Media, Embedded File, and Hyperlink.
Wrap Label check box

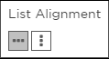
List Alignment
Use this control to change the alignment of lists.
Applies to: The Check List, Radio Buttons components.
List Alignment options
Border
Use this control to change the appearance of the border around a Section component. You can select the type of border — solid, dashed, or dotted — the width, and the color.
Border options
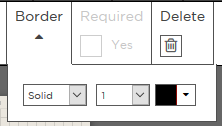
Required
Use this control to require components to be completed. Forms are automatically checked when Completed or Submitted. The form filler will not be able to complete or submit the form until these required fields are filled out.
Applies to: All components except Heading, Subheading, Paragraph, Embedded Media, Embedded File, and Hyperlink.
Required check box

Undo/Redo
Use this control to undo or redo component layout actions which include, moving, resizing, and deleting components as well as dragging a component onto the canvas, making components required, and changes to borders, label font, data font, label position, wrap label, label alignment, and hide/show label. Undo/Redo is limited to the 5 most recent changes to the template and affects layout changes only. Saving as Draft or Publishing the template will clear the Undo/Redo cache.
Undo/Redo Buttons
Delete
Use this control to remove a component from the canvas.
Applies to: All components.
Delete button

Additional features
Copy Page and Add Page
To copy an entire page including its components from your template, click Copy Page at the bottom of the template. The copy will appear on the following page.
To add a new blank page to your template, click Add Page at the bottom of the template editor. The new blank page will appear on the following page.
Keyboard shortcuts for the template editor
To use the following keyboard shortcuts, highlight one or more components on your canvas:
| Action | Keyboard shortcut |
|---|---|
|
Copy |
CTRL + C |
|
Paste |
CTRL + V |
|
Cut |
CTRL + X |
|
Delete |
Delete or Backspace |
|
Undo |
CTRL + Z |
|
Redo |
CTRL + Y |
|
Highlight all |
CTRL + A
|
|
Highlight Multiple |
Hold CTRL and click the components you want to highlight. |
|
Unhighlight |
CTRL + Click.
|
|
Display Diagnostics Info on Template Editor |
CTRL + ALT + /
|
|
Move Multiple Components at Once |
|